Create New Account With Multiple Contacts, And Multiple Tasks Assigned To The Contacts
In this guide, we will explain how to create a new Account record with multiple Child Contact records, and multiple Tasks linked to the Contact records.
1. Please select the “New Form” option on your Formyoula Dashboard - https://app.formyoula.com/dashboard
2. Please rename your form.
3. Please drag&drop the necessary fields for the Account record creation. In this case, we will use only the Account Name.

4. Please drag&drop the Repeat Group element on your form. The Repeat Group allows creating multiple records in Salesforce with a single form submission.

5. Please drag&drop the necessary fields inside the Repeat Group for the Contact record creation.

6. Please drag&drop the Salesforce Table element inside the Repeat Group. This allows creating multiple Task records for each Contact record per Repeat Group entry.

7. Please edit the Salesforce Table element by clicking on the pencil icon. Please select the Task Object and the necessary Task fields.
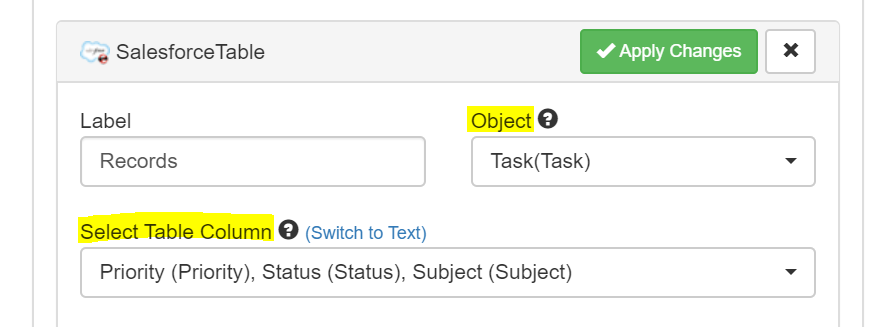
8. Please apply the changes to the Salesforce Table element.

9. Please set the “Returned Record Count” to 0. We will be creating new Task records, and this option will make sure not to display any existing Tasks.

10. Next, please add the Salesforce Table Columns by selecting the Task field, adding the field label, and setting the field data type.

11. For Select/Picklist fields, please ented the values under the Options section. The Select values need to be added in one row separated by commas.
High, Normal, Low

12. Once the columns are added, please enable the “New Record Button” under the advanced settings. This option will allow adding/creating new records via the Salesforce Table.

13. Please save and close the form once all the fields are added, and the changes applied.

14. Next, please click on the “Create a Connection” button next to the newly created form.

15. Please select Salesforce from the drop-down list and click on the “Create Connection” button.
16. Please select the Account Object from the list.

17. Please map all the necessary fields.

18. Next, please click on the “Back to Connections” button.
19. Now, we will add another Salesforce connection.

20. Please select the Contact Object.

21. First, please enable the “Use Repeat Group” by selecting your Repeat Group under the Salesforce Record Settings tab. Once added, please click on the “Save Record Settings” button.

22. Please map all the necessary fields.

23. And please map the Formyoula system field [New Account Record ID (Seq 1)] to the Account ID field. This will make sure to link the Contact records to the Parent Account.

24. Next, please click on the “Back to Connections” button to add the third connection.
25. Once again, please select Salesforce from the list and create the connection.

26. Please select the Task Object.

27. Please enable the “Use Repeat Group” option by selecting your Salesforce Table under the Salesforce Record Settings tab. Once added, please click on the “Save Record Settings” button.

28. Please map the Formyoula system field [New Contact Record ID (Seq 2)] to the Name ID (WhoId) field. This will make sure to link the Tasks to the Parent Contact record.

29. Now once the form and Salesforce connections are created, we can try the form on the mobile web app - https://app.formyoula.com/mobile.

30. Now we can capture all the fields to create an Account record, multiple Contact records, and multiple Tasks. All the records will be linked in Salesforce accordingly.

31. Once the form is submitted, the records will be created in Salesforce.
Account record:

Two Contact records linked to the Account:

And each of the Contact will have the assigned Tasks:


For any questions, please contact us - support@formyoula.com.